
Does it seem like all of a sudden, your social media feed is filled with sourdough?It's no wonder why there has been a resurgence of bread-making. Between work and kids and your ever-growing "to-do" list, the act of making sourdough can be empowering and meditative.But while the pretty, edited Instagram videos are great, sourdough feels like a mystery to many beginners.Many of us won't ever open a bakery or sell our loaves at a farmer's market, but we've fallen in love with handcrafted sourdough. Bread-making provides us with a sense of accomplishment, is a healthier alternative to grocery store offerings, and has changed lives.You don't need expensive equipment, a commercial bakery, or a degree in chemistry to join the sourdough movement.Sourdough can be approachable and easy. Join me!
Guide to Sourdough Starters
Every starter is unique and will taste different depending on its age, the type of flour used for feeding, how often it is fed, and the interacting community of microbes (yeasts & bacteria) in the air and your jar.You can purchase a starter online, but making your own is easy, and oh, so worth it.
What is Sourdough Starter?
A sourdough starter is a living mixture of flour, water, wild yeast, and lactic acid bacteria. These natural organisms work together to make your bread rise and give it that tangy flavor everyone loves. It’s like having a tiny ecosystem in a jar!
Introduction to Sourdough Starters (The Basics)
Baking sourdough bread might sound intimidating, but it all starts with one magical ingredient: the sourdough starter. This little jar of flour and water is a powerhouse of flavor and a natural way to make bread rise. Let’s break it all down so you can start your sourdough journey with confidence.
Why make your own?
Using a sourdough starter isn’t just about the taste (though it’s amazing). It’s also healthier! The long fermentation process breaks down gluten and makes bread easier to digest, even for some people with sensitivities. Plus, there’s something special about creating bread from scratch. It’s comforting, creative, and downright satisfying.
The science behind the magic
Here’s what’s happening inside your jar:
- Wild Yeast: This makes your bread rise. The yeast eats the sugars in flour and releases carbon dioxide, which creates those lovely air pockets in your loaf.
- Lactic Acid Bacteria: This adds flavor, helps preserve your bread, and contributes to that chewy texture.
It’s a perfect partnership that’s been used for thousands of years. Pretty great, right?
How to make a sourdough starter
Creating your starter from scratch is surprisingly simple. All you need is flour, water, and a bit of patience. Here’s how:
1. Day 1: Mix 50 grams of flour and 50 grams of room-temperature water in a clean jar. Stir well, cover loosely, and leave it at room temperature.
2. Day 2–14: Discard half of the mixture daily and feed it with fresh flour and water (50 grams of each). Stir and cover.
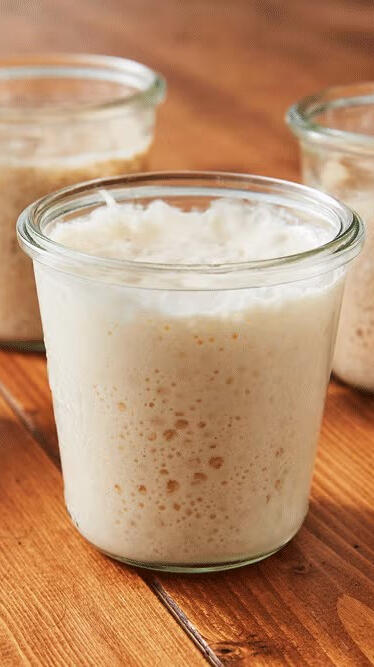
3. Signs of Life: Bubbles, a yeasty smell, and a slight rise mean your starter is active and ready to use.
Note about discard: I've seen videos suggesting you can immediately start saving your discard. This is a mistake. Until your starter is active and the healthy bacteria have taken over, the portion of your starter that you "discard" may make you sick and should not be consumed.
How to care for a Sourdough Starter
Keeping your starter alive and happy is pretty simple, but it does require some TLC. Here’s what to do:
1. Feed It Regularly
Feed your starter with equal parts flour and water. I like a 1:1:1 ratio, meaning equal weight starter, flour, and room-temperature water, fed every 24 hours and kept on the counter. If it’s in the fridge, once a week is enough. Feeding keeps it active and ready to bake.
2. Discard When Needed
When you feed your starter, you’ll need to discard about half of it. This prevents it from growing out of control and ensures the yeast and bacteria have plenty of fresh food to thrive. Don’t worry—you can save the discard for other recipes like pancakes or crackers!
3. Use It When It’s Active
Starter fed in a 1:1:1 ratio is most active 6–12 hours after feeding. That’s the sweet spot for baking. If it’s bubbly and smells pleasantly tangy, you’re good to go.Many blogs and bakers will tell you to time your dough-making to right when your starter has peaked. I'm a contrarian here. If you use your starter right when it has peaked, it's no longer hungry. To get the biggest bang for the buck, I like to wait an hour or two after my starter has peaked before making my dough. This means that my starter is hungry going into my dough.Don't stress about using your starter at precisely the moment it peaks. If you're a little late getting it into your dough, it's no big deal. Experiment and have fun with it!
Advanced Starters
The feeding cycle of a starter
After feeding, your starter will consume what you've fed it. This may take anywhere from 6-12 hours (or more) depending on a number of factors including the health of your starter and the temperature where its kept.If your starter is growing with a domed top, it is still feeding and has not yet "peaked".Once a starter has consumed all its food, the dome will flatten and the starter will slowly start to fall within its container. This is because it has run out of food and is no longer producing any gases.If your starter has more food, it will take longer to consume and therefore will take longer to "peak". Smaller ratios will peak faster.As the starter runs out of food, the yeast living in the culture essentially goes into a dormant state and your culture will start to smell more and more acidic the longer it sits without food. It can even start smelling like acetone or paint thinner if it goes a really long time without food.
Using feedings to control peak time
Depending on how old your starter is, how active it is, how warm your room is, and various other factors, your starter will have its own timeline. But if you can get a feel for how your starter typically functions, you can adjust your feeding ratios as needed to meet your schedule.If I need my starter to go into a dough sooner than it would normally be ready for, I might use a 1:1:1 feeding so that it peaks a little faster.I generally feed at a 1:3:3 or 1:4:4 ratio once a day, leaving my starter on the counter.All that said, breadmaking should be fun! Don't stress so much about your starter. As it gets older it will continue to get more resilient, in the case that you forget to feed it for a day or so.
Troubleshooting & Reviving your starter
Even though sourdough starters are resilient, they can occasionally show signs of trouble. Here’s how to handle common issues:Signs Your Starter Has Gone Bad
- Mold: Visible mold or orange/pink discoloration means it’s time to say goodbye.
- Foul Smell: A truly rotten smell (not just tangy or sour) indicates spoilage.When It’s Still Salvageable
- Hooch: A dark liquid on top is a sign your starter is hungry but not dead. Stir it in or pour it off before feeding.
- Acidic Smell: This is normal and can often be fixed with consistent feeding.How to Revive a Neglected Starter
1. Warm it to room temperature.
2. Discard most of the starter, keeping just a couple of tablespoons.
3. Feed it equal parts flour and water.
4. Place it in a warm spot and repeat the process every 12 hours until it bubbles back to life.If your starter remains lifeless after consistent care, it’s best to start fresh.
Starter FAQs
What's the difference between feeding ratios? (1:1:1 vs 1:2:2 vs 1:4:4)
When you read blogs or see videos that talk about starter ratios, they're talking about the amount of starter, compared to the amount of flour and water that you feed your starter.1:1:1 refers to a feeding comprised of equal parts starter, water, and flour.1:2:2 refers to a feeding comprised of 1 part starter, two parts water, and two parts flour. For example: 50 grams starter, 100 grams water, 100 grams flour.1:4:4 refers to 1 part starter, and four parts each of water and flour. For example: 50 grams starter, 200 grams water, 200 grams flour.The less food you give your starter, the faster your starter will "peak". The more food you give your starter, the more food it has to consume and the longer it will take to peak.
What does "hydration" mean in sourdough-speak?
Hydration in sourdough baking refers to the ratio of water to flour in the dough, expressed as a percentage. It directly impacts the dough’s texture, handling, and the final bread’s crumb structure and crust.How Hydration is Calculated
The hydration percentage is calculated using this formula:
Hydration (%) = (Water Weight ÷ Flour Weight) × 100For example: If your recipe uses 500 grams of flour and 375 grams of water, the hydration is:
(375 ÷ 500) × 100 = 75%If your recipe uses 500 grams of flour and 450 grams of water, the hydration is:
(450 ÷ 500) × 100 = 90%What 75% Hydration Dough Means
- Characteristics: A dough with 75% hydration is moderately wet but manageable for beginners. It’s easier to shape and handle compared to higher-hydration doughs.
- Texture: Elastic and tacky but not overly sticky.
- Final Bread: Produces a balanced crumb with medium holes and good oven spring.
- Who It’s For: Perfect for beginners learning sourdough techniques.What 90% Hydration Dough Means
- Characteristics: A 90% hydration dough is very wet and sticky. It requires advanced handling techniques like stretch-and-folds, coil folds, and careful shaping to build structure.
- Texture: Very slack and sticky at the start but develops strength over time.
- Final Bread: Creates an open, airy crumb with large holes (characteristic of artisan-style bread) and a thinner, crispier crust.
- Who It’s For: Best for experienced bakers who are comfortable managing high-hydration doughs.Explore and try recipes with different hydration percentages and find what you like!
Can you freeze starter?
Yes! Freeze it in an airtight container. Thaw and feed it to reactivate.
What's that liquid on top?
That’s hooch, a byproduct of fermentation. It’s harmless and just means your starter is hungry.
What happens if I skip the discard step?
Skipping discard can lead to an overly sour starter. Use the discard in recipes to avoid waste.
How do I know if my starter is ready to bake?
You can tell if your sourdough starter is ready to bake by observing its activity level. Here’s what to look for:Signs Your Starter is Ready
1. Bubbles and Volume: Your starter should be bubbly and have doubled in size within 4–12 hours of feeding, depending on the feeding ratio and temperature.
2. Dome Shape: A rounded dome at the top of the starter container indicates it’s actively rising.
3. Float Test: When your starter is at its peak, drop a small spoonful of starter into a glass of water. If it floats, it’s airy and strong enough to leaven bread. (Be careful not to deflate it when scooping for the test.)
4. Timing After Feeding: Most starters are at their peak strength 6–12 hours after feeding, depending on factors like temperature and feeding ratio.When Not to Use It
1. If it's been more than a couple of hours since its peak, your starter is past its most vigorous phase. It may still work for recipes that tolerate a more sour flavor.
2. If it hasn’t bubbled or risen significantly, it may need more feedings to become active and strong.Lesson Learned
Keep notes on how long your starter typically takes to peak after feeding so you can plan your baking schedule.
7 Steps to Sourdough
Sourdough is more complicated than, say, chocolate chip cookies. But with practice I believe it is exponentially more rewarding!This page shares the 7 basic steps to making a sourdough boule (round) or batard (oval) that you can really be proud of.Tips for Success
- Hydration Levels: Start with 70–75% hydration (water-to-flour ratio) and increase as you get more comfortable handling wetter doughs.
- Temperature: Maintain a warm environment (~75–80°F) for fermentation.
- Patience: Good sourdough is a slow process. Don’t rush!
1 - Prepare your Starter
See Starter sections of this website for tips and tricks to developing your starter.If you're baking a single loaf, you'll need approximately 50g active sourdough starter, depending on your recipe.Recipes generally say that you want to time your starter so that it is peaking when you mix the dough.This means you'll want to feed your starter approximately 6-12 hours before baking.It should double in size and have a honeycomb-like structure with bubbles that are visible through a glass jar.All that said, we're home bakers here and baking should be fun. If you're able to time your baking to within a few hours after your starter has peaked, you're absolutely fine.
2 - Mix Dough
The initial mixing of your dough is generally done in two parts an initial Autolyse followed by the addition of salt and starter (+ any other additions).Mixing Part 1: Autolyse: Although it sounds fancy, autolyse means simply to combine your recipe's flour & water (room temperature or lukewarm), then let it rest for 30-45 minutes (or up to 4 hours). Autolyse allows the flour to hydrate and triggers gluten and starch development, resulting in more flavorful, aromatic, and pliable dough.Benefits of Autolyse
- Improves hydration: Softens tough flours, especially whole wheat.
- Enhances gluten development: Reduces kneading time.
- Retains carotenoid pigments: Boosts bread's flavor, aroma, and color.
- Eases shaping: Produces smoother, more elastic dough. This one's important for beginners!When to Use Autolyse
- Best for high-protein or whole wheat flours in crusty bread like sourdough, baguettes, and Italian bread.
- Skip the autolyse step for rye or freshly milled flours, as these ferment too quickly.Steps to Autolyse
- Mix flour and water (room temp or lukewarm): Combine until moistened, avoiding overmixing.
- Rest the dough: Cover and let sit for 20 minutes to 4 hours, depending on your flour type.
- Check readiness: Dough should appear smooth, shiny, and pass the windowpane test.How Long to Autolyse
- White flour: 20 minutes to 3 hours.
- Whole wheat flour: 1 to 4 hours.
- Most recipes benefit from 20 to 60 minutes of autolyse.
- Skip autolyse step if using rye or freshly milled flours.Tips for Autolyse Success
- Measure additional ingredients beforehand to avoid forgetting them later.
- Start with shorter rest periods if you’re new to autolyse.
- Avoid over-resting, as it can weaken the dough and make it sticky or unusable.Lesson Learned: Autolyse is flexible. Experiment and have fun with it to find the perfect timing for your recipe and flour type.Mixing Part 2: Add Salt & Starter: After autolyse, first add salt to strengthen your gluten and regulate yeast activity. Dissolving salt in a small amount of water can help evenly distribute throughout your dough.Then add your active sourdough starter, ensuring it is bubbly and vigorous to kickstart dough fermentation.Fold or knead gently to incorporate ingredients without tearing gluten strands prematurely. Avoid overworking the dough at this stage.What should my dough look like at this point?Appearance:
1. Smooth but Undeveloped:
- The dough will appear smooth on the surface but is not yet stretchy (elastic).
- If you’ve done an autolyse, the dough may look more cohesive compared to if you skipped the autolyse step.
2. Dense:
- The dough will look relatively compact with no noticeable bubbles or signs of fermentation.
3. Uniform:
- The ingredients (flour, water, salt, and starter) should be well-incorporated with no visible lumps of flour or dry spots.
Feel:
1. Sticky but Manageable:
- The dough will be somewhat sticky to the touch, especially if it’s a higher-hydration dough (70%+ hydration). It will cling to your hands but shouldn’t be runny or overly wet.
2. Cool and Soft:
- The dough will feel cool, reflecting the temperature of your ingredients and environment. It has a soft but slightly springy texture.
3. Some Resistance:
- While the dough is cohesive, it may still tear or resist when stretched due to underdeveloped gluten.
How It Behaves: At this stage, the dough doesn’t have much elasticity or extensibility (ability to stretch). It may stretch slightly when pulled but will quickly break rather than forming long, smooth strands.Ready for Step 3: Bulk Fermentation?
3 - Bulk Fermentation
The purpose of bulk fermentation is to allow the dough to ferment and develop flavor and structure.This is the step that will require the longest block of time where you really need to be close, paying attention, and working your dough. Block out about 4 to 6 hours.What to expect during bulk fermentation:
- During bulk fermentation, the dough transforms significantly as fermentation develops:
- It will become lighter, puffier, and more elastic.
- Bubbles will start forming (this is yeast activity).
- It will feel easier to handle the dough as gluten strengthens and hydration evens out.
This starting stage is critical for setting the foundation for a well-fermented, airy loaf!What You'll Need:
- A large, clear container or bowl
- Dough or bench scraper for handling the dough
- A lid, plastic wrap, or a damp cloth to cover the container so your dough doesn't dry out1. Transfer the Dough to the Container
- After mixing, transfer your dough into the prepared bulk fermentation container.
- Use a dough scraper to ensure you transfer all the dough without leaving behind scraps.
2. Initial Rest (also called "Bench Rest"): Let the dough rest untouched for 20–30 minutes at the start. This gives the gluten time to relax and allows the flour to fully absorb the water.
3. Stretch & Folds: To strengthen the dough and create structure, you'll perform a series (3 to 4 rounds) of stretch and folds, spaced 30–45 minutes apart.How to Do Stretch & Folds:
a. Wet your hands to prevent sticking.
b. Gently grab one edge of the dough, stretch it upwards without tearing, and fold it over to the opposite side.
c. Rotate the container 90 degrees and repeat with the next side.
d. Continue until you've stretched and folded all four "sides" of the dough (like a compass).
e. Cover the dough and let it rest until the next round.Why Stretch & Folds are Important: Stretching and folding builds gluten strength, redistributes yeast for even fermentation, and traps gas bubbles for a better crumb.4. Monitor the Dough's Progress: Watch for signs that the dough is fermenting properly:
- Increase in Volume: The dough should increase by about 30–50% (not double).
- Bubbles: Look for small bubbles forming on the surface and within the dough (visible through a clear container).
- Elasticity: The dough should become smoother and more elastic as fermentation progresses.
5. Manage Temperature:
- Ideal Range: Keep the dough at 75–78°F (24–26°C) for consistent fermentation.
- At cooler temps, fermentation will slow down, and you may need more time between stretch and folds or a longer overall bulk.
- At warmer temps, fermentation will speed up, so monitor closely to avoid over-proofing.
6. Time for Bulk Fermentation: Bulk fermentation typically lasts 4–6 hours, depending on the dough's hydration, starter strength, and room temperature. Check the dough's readiness rather than relying solely on time.
7. How to Know Bulk Fermentation is Complete:
Look for the following signs:
- Volume: The dough should be puffier and have increased by about 30–50%.
- Bubbles: You’ll see visible bubbles on the surface and sides of the dough.
- Feel: The dough will feel airy, jiggly, and less sticky, with good elasticity.
- Poke Test: Gently poke the dough with a floured finger. It should slowly spring back but still show a slight indentation.
8. Move to Pre-Shaping:
Once bulk fermentation is complete, it’s time to divide and pre-shape the dough for its final proof.Tips for Bulk Fermentation Success:
- Use a Timer: Set a timer to remind you of stretch and fold intervals.
- Be Gentle: Avoid deflating the dough during stretch and folds. Handle it gently to maintain the gas bubbles.
- Don’t Rush: If the dough hasn’t risen enough, extend the bulk fermentation time, checking every 30 minutes.
- Avoid Over-Fermentation: Over-fermented dough will feel overly soft, sticky, and may collapse when handled. Keep an eye on it to prevent this. You can still use your dough if you over-ferment it, but your end product won't be as good.By mastering the bulk fermentation step, you’ll set the foundation for a flavorful, airy loaf with great structure and crumb!
4 - Shaping the Dough
Once the bulk fermentation is complete, the next steps are pre-shaping and shaping the dough. These steps are crucial for creating structure, strength, and the final shape of your loaf. Let’s dive in.What You’ll Need:
- A lightly floured work surface (use flour sparingly to avoid affecting hydration of your dough).
- A bench scraper or dough scraper.
- A proofing basket (banneton) or bowl lined with a floured towel.
- Optional: Many bakers use rice flour for dusting (prevents sticking better than wheat flour). Honestly, this isn't needed if your bulk fermentation step is done properly.Step 1: Turn Out the Dough
- Lightly flour your work surface to prevent sticking.
- Use a bench scraper to gently release the dough from the bulk fermentation container without tearing it.
- Handle the dough carefully to preserve the gas bubbles formed during bulk fermentation.Step 2: Divide the Dough (If Making Multiple Loaves)
- Use a bench scraper to divide the dough into equal portions if you’re making more than one loaf.
- Weigh the dough portions to ensure consistency if desired.
- Avoid tearing or overly deflating the dough during this step.Step 3: Pre-Shape the Dough
Pre-shaping gives the dough a preliminary structure and helps tighten its surface.
- Lightly flour the top of the dough and flip it over so the floured side is on the work surface.
- Using your hands and the bench scraper, gently gather the edges of the dough toward the center, creating a loose round or oval shape.
- Flip the dough seam-side down.
- Use the bench scraper and your hand to gently rotate the dough on the surface, tucking it under slightly as you go. This creates surface tension.
- Let the pre-shaped dough rest uncovered for 20–30 minutes. This rest period, called the "bench rest", allows the gluten to relax, making shaping easier.Step 4: Shape the Dough
Shaping is where you define the final structure of your loaf. The method will depend on the shape (round boule or long batard):Shaping a Round Loaf (Boule)
- Lightly flour the top of the dough and flip it over so the smooth side is down.
- Gently stretch one edge of the dough and fold it toward the center.
- Repeat with the opposite edge, folding it over the first fold.
- Repeat for the remaining two sides, folding all edges toward the center to create a tight ball.
- Flip the dough seam-side down.
- Using your hands, rotate the dough on the work surface while gently tucking the edges underneath to create surface tension. The dough should feel tight but not tear.Shaping an Oval Loaf (Batard)
- Lightly flour the top of the dough and flip it over so the smooth side is down.
- Gently stretch the bottom edge of the dough and fold it up to the center.
- Fold the top edge down to meet the bottom fold.
- Fold the sides inward slightly to form a rough rectangle.
- Starting from the bottom edge, roll the dough tightly toward the top edge, tucking it in as you go.
- Pinch the seam closed and place the loaf seam-side down.
- Gently shape the loaf into a tighter oval by rolling it slightly with your hands.Step 5: Transfer to Proofing Basket
- Dust a proofing basket or bowl lined with a kitchen towel with flour (rice flour works better than wheat flour to prevent sticking).
- Place the shaped dough seam-side up in the proofing basket.
- Lightly flour the top of the dough to prevent sticking.
5 - Final Proof
The Final Proof is the last fermentation stage before baking, where the shaped dough rests and rises until it reaches its optimal volume. This step is crucial for achieving the right balance between strength and airiness in your bread.What Happens During the Final Proof
- Gas Development: The yeast produces carbon dioxide, causing the dough to rise further.
- Flavor Enhancement: The final proof allows fermentation to continue, deepening the flavor profile of the bread.
- Gluten Relaxation: The dough's gluten structure relaxes, making it more extensible (stretchy), which improves oven spring.Steps for a Great Final Proof
1. Choose Your Proofing Vessel
- Banneton (Proofing Basket): Ideal for shaping and supporting the dough. Use a banneton if you want structured loaves with a defined shape and flour pattern.
- Loaf Pan: Perfect for sandwich-style breads.
- Bowl with Cloth Liner: A budget-friendly alternative to a banneton.
- Lesson Learned: Dust the banneton or liner with flour to prevent sticking. Many bakers will tell you to use rice flour here. If you don't have rice flour, use whatever you have.2. Transfer the Shaped Dough
After shaping, gently place the dough into the proofing vessel seam side down for a smooth top after baking.
- Note: Doing your Final Proof seam side up will result in a rustic, self-cracking loaf.3. Decide on Proofing Method
Room-Temperature Proof
- Temperature: 70–80°F (21–27°C).
- Duration: 1–4 hours, depending on dough hydration and ambient temperature.
- Use this method if you're baking the same day.
Cold Proof (Retardation)
- Place the dough in the refrigerator (34–40°F or 1–4°C).
- Duration: 8–48 hours.
- Benefits: Slows fermentation, enhances flavor, and makes scoring easier.4. Monitor Dough During Proofing
- The key to a successful proof is knowing when the dough is ready.
Use these techniques to check:
- Visual Check: The dough should increase in volume (but not double) and look smooth and taut.
- Poke Test: Gently press your finger into the dough about ½ inch deep: If the indent springs back slowly and leaves a slight impression, it’s ready. If it springs back quickly, the dough is under-proofed. If it doesn’t spring back, it may be over-proofed.Key Indicators of a Successful Final Proof
- Dough is airy but not collapsed.
- Dough has a smooth surface with slight bubbling.
- Dough passes the poke test with a slight spring back.Common Problems with Final Proofs & How to Fix Them
1. Over-proofing: Over-proofing is caused when the dough is left too long, resulting in collapse. While you can still bake with it, your final product won't be as airy. Next time, shorten your proofing time or use the cold proof method.
2. Under-proofing: If your final proof is too brief (short), the dough will be insufficiently fermented. It's not too late! Continue proofing until you get a good poke (explained above).
3. Sticky Dough: It's ok for dough to be sticky if you have a High Hydration recipe. Sticky Dough at this stage can also be caused by humidity. Dust your dough with flour before transferring to your proofing vessel.
6 - Score
There are a lot of steps in baking sourdough. With practice and patience your skills will continue to improve. But let's be honest, making bread is more meditative than "fun". That is, until you get to the scoring step.Scoring is the artistic part of bread-making. There's a lot of opportunity to have fun with it. Don't overthink your scoring. Have fun, and enjoy this part!Scoring sourdough is a critical step in baking. It serves an aesthetic purpose, as discussed above, but it also serves a functional purpose. Scoring allows the dough to expand properly in the oven, prevents random cracks, and can create stunning patterns that add a personal touch to your loaf.Why Scoring is Important
- Scoring Directs Expansion: Scoring creates weak points in the dough's surface, guiding where the loaf expands (or "springs") during baking.
- Scoring Prevents Blowouts: Without scoring, steam trapped inside the dough can cause uncontrolled tearing.
- Scoring Adds Artistry: Decorative scoring turns your bread into a work of art.Tools for Scoring
- Lame (Bread Scoring Tool): A razor blade attached to a handle for precision.
- Sharp Knife: A chef’s or paring knife works in a pinch.
- Scissors: Useful for unique, jagged designs.
- Flour Duster (Optional): Sprinkle flour for contrast and better visibility of the scoring pattern.Preparing for Scoring
- Chill the Dough: Cold-proofed dough is firmer and easier to score. Some bakers put their final dough in the freezer for a few minutes after final proofing to really firm things up.
- Lightly Flour the Surface: Dust the surface with flour to reduce stickiness and highlight the scoring lines.
- Position the Dough: Place the dough on parchment paper or directly on the counter. Ensure the seam side is down unless you want natural cracking (in which case, leave the seam side up).Scoring Techniques
1. Functional Scoring (Basic Cuts)
- Single Slash: A single, deep cut (½ inch deep) along the length of the dough. Ideal for batards or baguettes.
- Cross Slash: Two perpendicular cuts for a classic look.
- Square Slash: Four slashes forming a square. This option is great for round loaves.
2. Decorative Scoring (Advanced Designs)
- Leaf or Wheat Patterns: Use shallow cuts to create intricate leaf-like shapes.
- Spiral: A continuous curve spiraling around the loaf.
- Starburst: Radiating cuts from the center outward.Pro Tip: Combine functional scoring with decorative designs. Make one deep cut to control expansion and shallow, artistic cuts for aesthetics.How to Execute the Cut
- Make sure your lame is sharp. I replace mine every 12 loaves or so.
- Hold the Lame at an Angle: A 30–45° angle creates flaps that lift and bloom during baking.
- Apply Firm, Smooth Pressure: - Avoid sawing motions. A quick, confident cut ensures clean lines.Depth of Cut
- Functional cuts: ½ inch deep.
- Decorative cuts: ⅛ to ¼ inch deep.Scoring Tips for Success
- Work Quickly: Once out of the fridge, dough warms up fast and becomes harder to score.
- Keep the Blade Sharp: Replace dull razor blades regularly for clean cuts.
- Experiment: Practice on spare dough or make simple patterns as you build confidence.
7 - Bake & Cool
Almost there! Are you ready for bread yet?Baking sourdough is the culmination of all your efforts, and doing it properly is essential for achieving a beautiful crust, airy crumb, and delicious flavor. Cooling the loaf correctly is just as important, as it allows the bread to set and develop its full texture and taste.Underbaked loafs can be gummy. A perfectly baked loaf that is cut into too early can, by the same token, give you a gummy result. Sourdough is about patience and this part is the hardest for me. After baking, you must let your loaf rest until it is fully cooled.Step 1: Preparing the Oven
Preheat Your Oven
- Temperature: Many/most sourdough recipes bake at 450°F (230°C). Adjust based on your recipe and oven.
- Preheat Time: For my home oven, I preheat about 30 minutes to ensure even heat distribution. During the first few minutes of baking, having high, distributed heat is critical.Baking Vessel
- Dutch Oven: Retains steam and heat for an optimal rise and crust.
- Baking Stone/Steel: Provides even heat. You can use a pan of water or a spritz bottle for steam.
- Sheet Pan: Works with added steam, but crust and rise may differ slightly.Steam
- First: please, please, please be careful when baking with steam. For home ovens with glass doors, I've heard horror stories of those glass panels shattering. I've also heard horror stories of bakers having eye injuries due to steam hitting their faces. Be safe, ok?
- Steam is critical during the first 10–15 minutes of baking to allow the loaf to expand before the crust hardens. How you handle steam depends on your baking method.
- Dutch Oven: Automatically traps steam from the dough.
- No Dutch Oven: Place a shallow pan of boiling water at the bottom of the oven or on the bottom rack.Step 2: Baking the Loaf
- Transfer the scored dough (on parchment paper, if needed) into your preheated baking vessel or onto your stone/steel. Work quickly to minimize heat loss.Baking Timeline
- Initial Bake with Steam (20–30 minutes): Bake with the lid on (Dutch oven) or with steam added. This phase encourages oven spring and crust development.
- Dry Bake (10–20 minutes):
Remove the lid (Dutch oven) or let the steam dissipate. Continue baking until the crust is deep golden brown.
- Check for Doneness: Your bread is fully baked when the internal temperature reaches 205–210°F (96–99°C).
- Visual: The crust should be dark and caramelized, not pale or undercooked.Step 3: Cooling the Bread
Hang in there, your bread is almost ready! Cooling is just as crucial as baking. Cutting into hot bread will ruin the crumb structure and release trapped moisture.Why Cooling Matters
-Crumb Development: The interior continues to set and stabilize after baking.
- Flavor: Cooling enhances the flavor as aromas concentrate.
- Texture: A fully cooled loaf will have a chewy, structured crust and tender crumb.How to Cool Properly
- Transfer to a Wire Rack: Elevate the loaf for air circulation to prevent the bottom from becoming soggy.
- Cooling Time:
Small loaves: 1–2 hours.
Large loaves: 2–4 hours.
Don’t Wrap Too Soon: Wrapping warm bread traps steam and softens the crust.Tips for Baking Success
- Adjust Baking Times for Your Oven. Every oven is different, so using an oven thermometer will ensure accurate temperatures.
- Rotate the Loaf:
For even baking, rotate the loaf halfway through the bake.
- Listen for the Crackle:
A well-baked sourdough loaf will “sing” as it cools, with crackling sounds from the crust. So fun!Storage Tips
- Room Temperature: Store the loaf unwrapped for the first 24 hours to maintain a crispy crust. Wrap in a tea towel or paper bag afterward.
- Freezing: You can slice and freeze in a sealed bag for up to 3 months. Reheat slices directly in the toaster or oven.
Shop for my favorite tools & Supplies
COMING SOON!
About
Hi. I'm Lucia Maloney, a working mom who grew up skiing, hiking, and camping Lake Tahoe. I live in Carson City, Nevada with my husband and our two young children.The COVID-19 pandemic exploded our world. Finding balance between two full time jobs, toddlers at home, and the risk of the virus to our family and friends was quite simply too much.Fortunately, my husband's income allowed me to quit what was, at the time, my dream job, in pursuit of balance. Of peace. Of joy.Baking has become that for me. Every bake turns out differently (and not always how I want it). The exercise of maintaining my starter, the meditative qualities of preparing my dough, and the happiness that I get from serving something healthful and homemade to my family - is priceless.Sourdough doesn't have to be complicated, expensive, or scientific. It can be joyful. I hope this website is helpful. I hope it helps you find balance and joy, too.

Disclaimer
I'm not a professional chef. I never went to culinary school. I most certainly did not ace chemistry in high school.The information provided on this website represents anecdotal experience and/or personal opinions only. There is no guarantee as to its accuracy. Information on this site has not been evaluated by the FDA and nothing on this site is intended to diagnose, treat, cure, or prevent any disease or medical condition. Materials or recommendations on this site do not constitute legal, medical, or any other professional advise on any subject matter. We do not accept any responsibility for any loss which may arise from reliance on information contained on this site and make no representations or warranties.Reproduction, distribution, replication, or publication of material contained within this site are expressly prohibited without prior written permission. All rights reserved.
Contact
Do you have stories or suggestions to share? Please do! I try my best to respond to all inquiries within 48-hours and look forward to hearing from you.
Thank you for visiting!
I hope that this site has been helpful for you and your sourdough journey.Please follow me on Facebook!